Create Your Own AVD On The Cloud
In this code lab, you will learn how to create a new AVD target and change its boot animation.
The whole code lab should take around 40 minutes
Android build anatomy
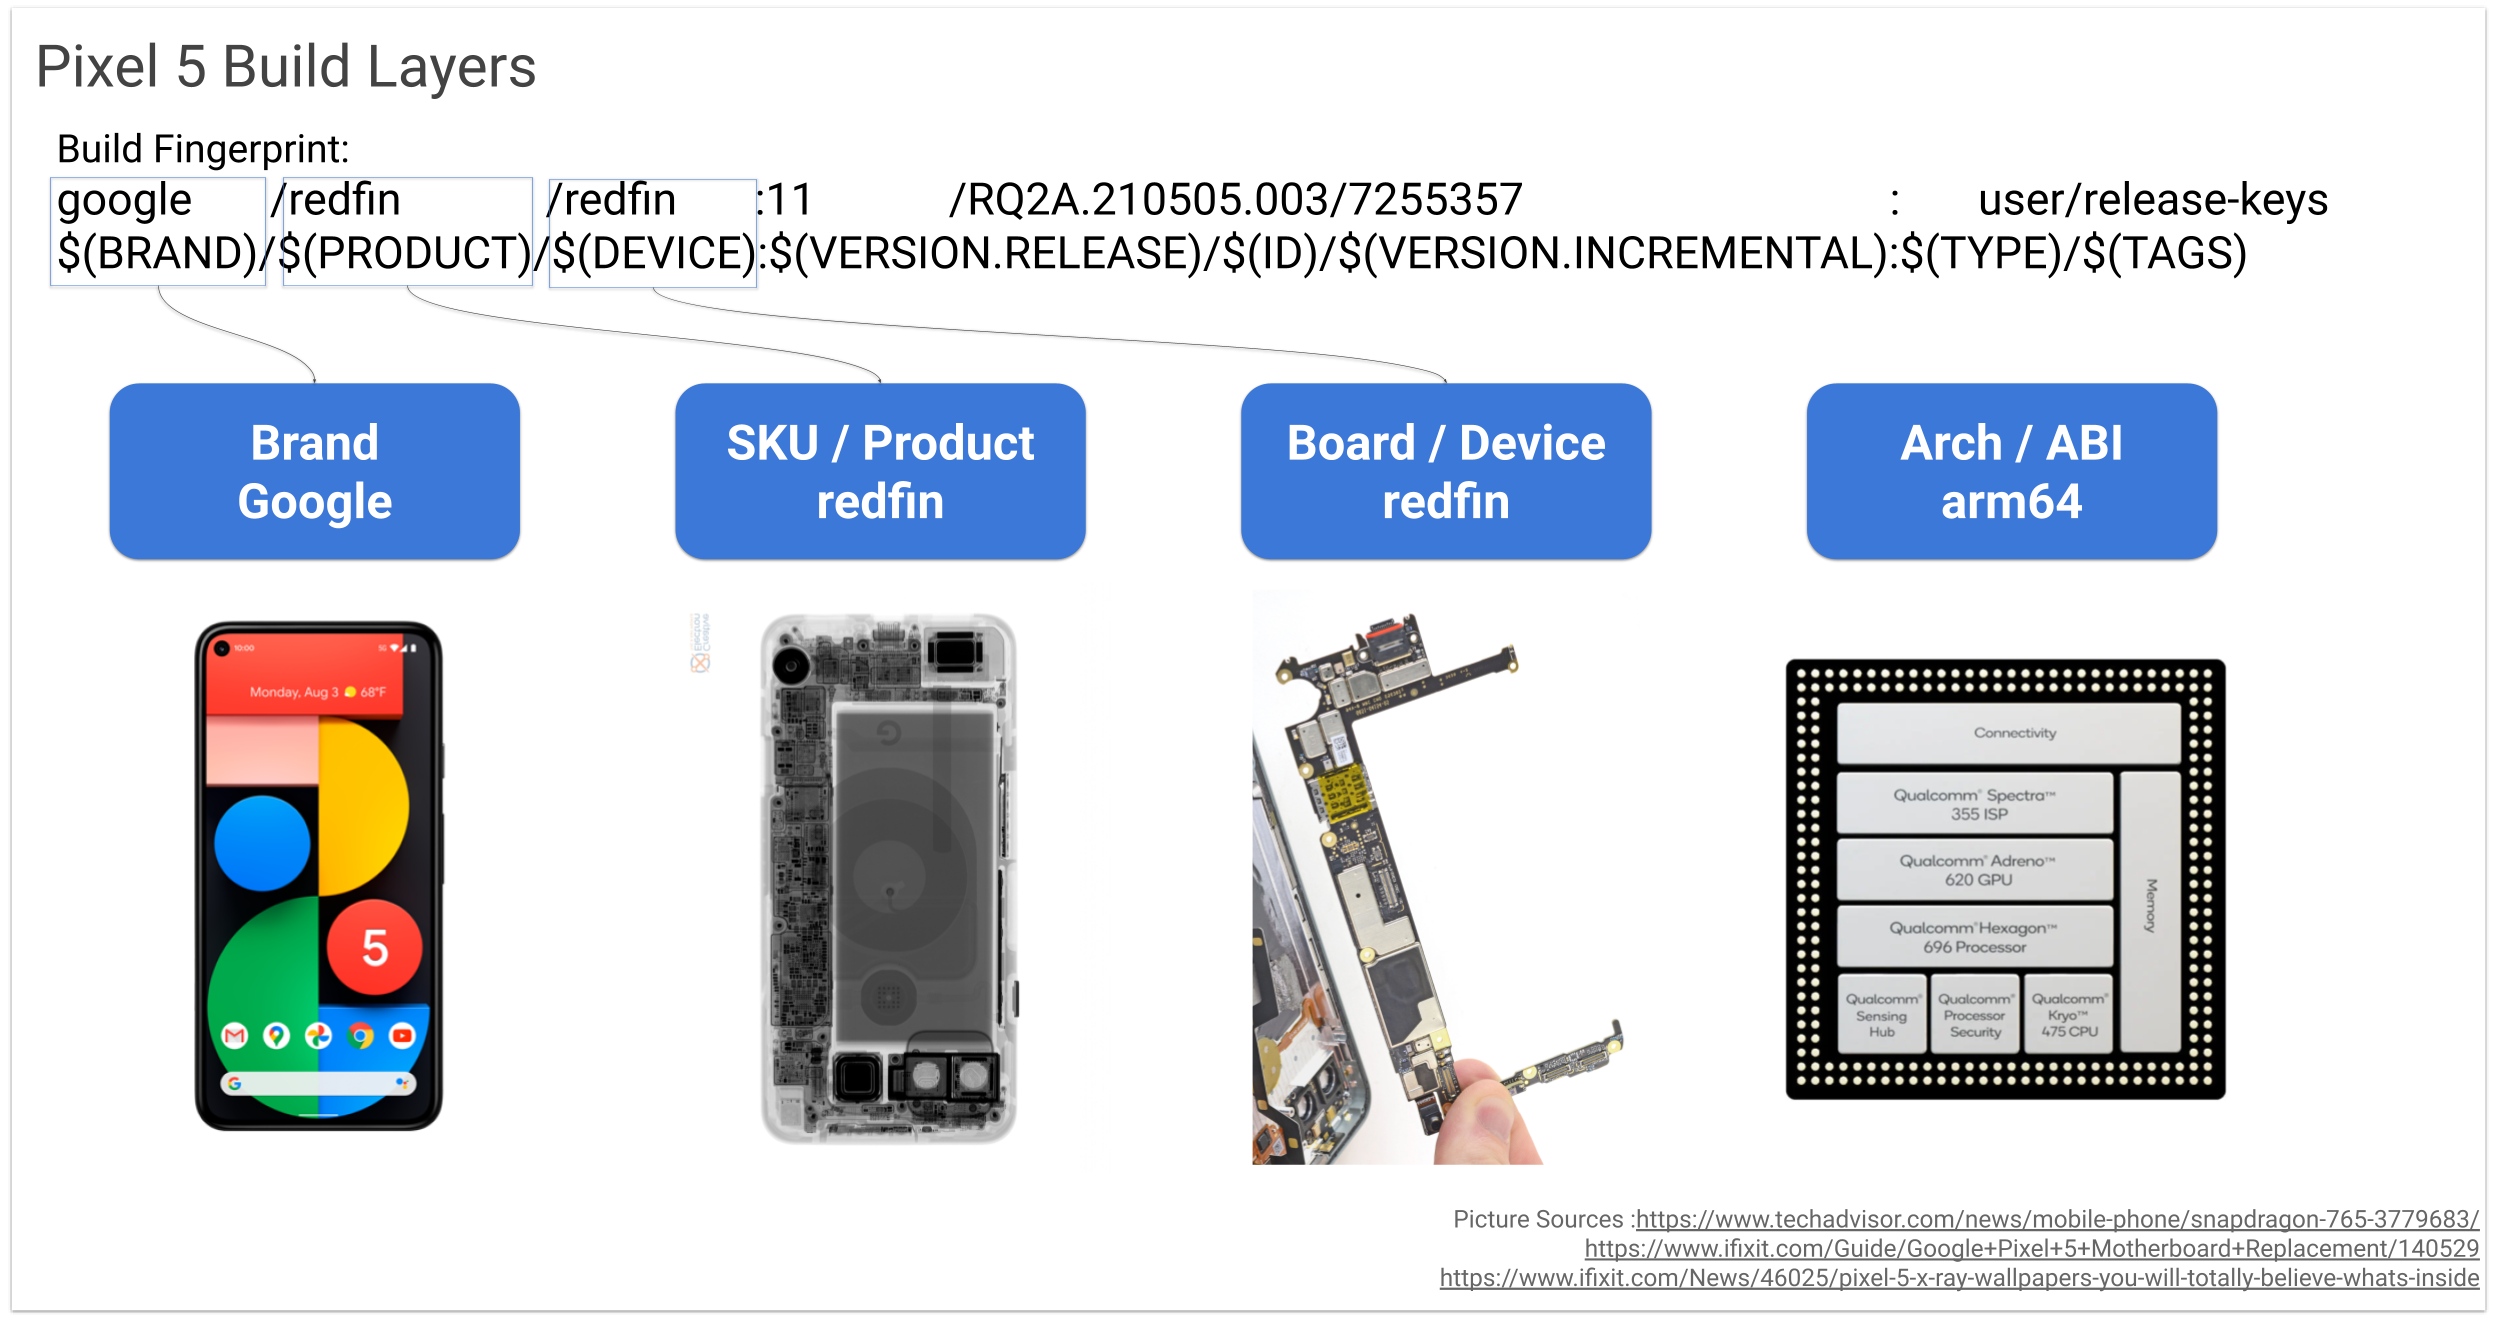
- Understanding build layers
- Build parameters & fingerprint
- Pixel 5 build make files
- Nexus & Pixel factory images
Create your own AVD
- Create your company & device folders: ${ANDROID_BUILD_TOP}/asd/aphone
echo "Set to the android source code folder" export ANDROID_BUILD_TOP="/ws/android" mkdir -p ${ANDROID_BUILD_TOP}/asd/aphone - Create AndroidProducts.mk file for Android Build System to know your build target.
- Create aphone.mk to configure your build target.
- Create aphone_product.mk for the product
specific build configuration.
echo "Copy make files & scripts from codelab3" cp -r /ws/asd-codelabs/codelab3/res/asd ${ANDROID_BUILD_TOP}/device/asd - Use asd.sh, development utility scripts to make the setup, build
& run workflow easier.
cd ${ANDROID_BUILD_TOP} echo "Setup" && lunchAPhone echo "Build" && asd.sh buildAPhone echo "Run" && emulator &- Building aphone first time can take more than 8 min., but it’s better than hours because it’s pretty close to sdk_phone_x86_64 to reuse many same object files.
- Check the build fingerprint & Settings -> About emulated device for aphone, and by adb. ``` adb shell getprop | grep finger
echo “To get more info” && asd.sh avdInfo
<img src="res/aphone-about.png" width="300">

## Change the boot animation
Most device makers will add their own boot animation for their brands. You can
make your own too as:

1. Understand how [Android bootanimation](https://android.googlesource.com/platform/frameworks/base/+/master/cmds/bootanimation/FORMAT.md)
is built.

2. Add aphone specific bootanimation.zip, e.g.
mkdir -p ${ANDROID_BUILD_TOP}/device/asd/aphone/bootanimations
echo “Copy ATV boot animzation for example”
cp ${ANDROID_BUILD_TOP}/device/google/atv/products/bootanimations/bootanimation.zip
${ANDROID_BUILD_TOP}/device/asd/aphone/bootanimations/bootanimation-atv.zip
3. Add it to the makefile, $ANDROID_BUILD_TOP/device/asd/aphone/aphone.mk, e.g.

    Press **i** to enter insert mode, **esc** to exit insert mode, type in :wq then **enter** to save. For more detail, check out the the Refrence section
Boot animation
PRODUCT_COPY_FILES +=
device/asd/aphone/bootanimations/bootanimation-atv.zip:$(TARGET_COPY_OUT_PRODUCT)/media/bootanimation.zip
4. Build & Run the AVD to check the new ATV animation.
<img src="res/bootanimation-atv.gif" width="300">

## Preload an app
Device makers typically add preload apps to extend the core user experience for
their devices. This example shows you how to add a prebuilt app to aphone.
1. Download a sample app APK from [Jetpack Compose Samples](https://github.com/android/compose-samples#jetpack-compose-samples)
to ~/Downloads, e.g. [jetsnack-debug.apk](https://github.com/android/compose-samples/releases/tag/v1.0.0-beta07).

2. Copy the APK to aphone folder.
mkdir ${ANDROID_BUILD_TOP}/device/asd/apps cp ${HOME}/Downloads/jetsnack-debug.apk ${ANDROID_BUILD_TOP}/device/asd/apps
3. Create an Android.mk make file for the app in ${ANDROID_BUILD_TOP}/device/asd/apps.
#Prebuilt apps for ASD
LOCAL_PATH := $(my-dir)
include $(CLEAR_VARS)
LOCAL_MODULE := jetsnack LOCAL_MODULE_CLASS := APPS LOCAL_MODULE_TAGS := optional LOCAL_CERTIFICATE := PRESIGNED LOCAL_PRODUCT_MODULE := true LOCAL_SRC_FILES := jetsnack-debug.apk
include $(BUILD_PREBUILT)
4. Add the app into aphone, aphone_product.mk in ${ANDROID_BUILD_TOP}/device/asd/aphone.
ASD aphone apps
PRODUCT_PACKAGES +=
jetsnack
```
- Build & run to check out Jetsnack app is preloaded.

Extra credits
- How will you change the AVD to use another boot animation? e.g. Android Automotive one.
- How will you preload more apps or even your own apps?
- What are the Android device storage partitions?
- What are the Android images?
- How to build for Smarter Cars too: Android Virtual Device as a Development Platform